


Baseball Glove Break-In Tips: A 2026 Guide
Table of Contents
- How to Break in a Baseball Glove: The Right Way
- Preparing Your Glove Before Break-In Begins
- How Long to Break in a Baseball Glove
- Using Baseball Glove Oil and Conditioner
- How to Shape a Baseball Glove Pocket
- How to Break in a Baseball Glove Fast
- What to Avoid When Breaking in Your Glove
- Frequently Asked Questions
Last Updated: October 14, 2026
How to Break in a Baseball Glove: The Right Way
Breaking in a new baseball glove is one of those skills that separates players who are ready for game day from those who aren't. A stiff, unbroken glove costs you plays. The pocket won't form properly. Your hand gets fatigued faster. Ground balls slip out. But here's what most guides get wrong: they treat all gloves the same, ignore the leather type, and push you toward methods that can actually damage the glove.
At Prime Sports, we help athletes find the right equipment and learn how to care for it properly. A proper baseball glove break in takes time, but it doesn't have to be complicated. The goal is simple: soften the leather gradually, shape the pocket to your hand, and build a glove that performs when it matters.
Why proper break-in matters
A game-ready glove feels like an extension of your hand. The leather is supple, not rigid. The pocket forms around the ball instead of deflecting it. Your fingers move freely inside.
A glove that's broken in properly will last longer too. Leather that's been worked gradually stays flexible and resists cracking. Leather that's forced, heated, soaked, or pounded aggressively, becomes brittle and fails faster.
Most players skip the break-in process or rush it. They stuff the glove in a locker, play a few games, and hope it works out. That's how you end up with a glove that never quite fits right. A proper break in means you control the shape, the feel, and the timeline.
What you'll need before starting
You don't need much. A good glove mallet makes the work faster and safer. A quality conditioner softens the leather without damaging it. A baseball or softball for playing catch. And time, at least two to three weeks of consistent work.

Prime Sports carries the tools you need. The Rawlings Glove Mallet is a solid option for most players. If you want something heavier and more durable, the Baseball Glove Mallet made from Grade A Hickory Wood gives you precision control and lasts for years.

For conditioning, the Armie's Glovecon Premium Ballglove Care Spray is an all-natural option that softens leather without oversaturating it. It also protects against sun damage, which matters if your glove sits in a locker or bag under lights.
Preparing Your Glove Before Break-In Begins
New leather is tight. The fibers haven't loosened yet. Before you start pounding or conditioning, inspect your glove carefully. Check the webbing, the laces, and the heel. Make sure everything is secure.
If your glove came with a manufacturer's break-in recommendation, read it. Different leather types respond differently. Premium kip leather (like what you'll find on high-end gloves) softens faster than stiff cowhide. Synthetic leather doesn't soften the same way natural leather does.
Clean the glove lightly with a dry cloth. Remove any dust or debris from the manufacturing process. Don't use water yet. You're just preparing the surface.
Now you're ready to start the real work.
How Long to Break in a Baseball Glove
A realistic baseball glove break in timeline is two to four weeks of regular work. Not casual use. Actual, deliberate conditioning and shaping.
The first week focuses on softening. You're applying conditioner, working the leather with your hands, and starting to pound the pocket.
Week two is when you see real progress. The pocket starts forming. Your hand slides in more easily. The leather around the wrist becomes more flexible. This is also when playing catch becomes part of your routine.
By week three, your glove should feel close to game-ready. The pocket holds its shape. Your hand moves naturally. The heel flexes without resistance.
Week four is refinement. You're fine-tuning the pocket shape, making sure it matches your throwing hand and your position. A shortstop's pocket looks different from a first baseman's pocket.
Some players finish in two weeks. Others take a month. The timeline depends on how much you use the glove, how aggressive your conditioning is, and the leather type. Don't rush it.
Using Baseball Glove Oil and Conditioner
Conditioner is your most important tool. It softens the leather safely. It prevents cracking. It keeps the glove flexible through a long season.
The mistake most players make is using too much. A little goes a long way. You're not trying to soak the glove. You're applying a thin layer that the leather absorbs.
Spray conditioner works best. It applies evenly and dries quickly. The Armie's Glovecon spray goes on in a fine mist. One or two light coats per session is enough.
Apply conditioner to the entire glove, but focus on the stiff areas. The heel takes the most work. The palm and pocket come next.
Apply conditioner every two to three days during the first two weeks. After that, once a week is fine.
Never use heat to speed up the process. A microwave, oven, or direct sunlight damages leather. It makes it brittle and weak. The same goes for water. Don't soak your glove or run it under a faucet.
How to Shape a Baseball Glove Pocket
The pocket is where the ball lands. Its shape matters. A well-formed pocket catches and holds the ball. A poorly shaped pocket lets ground balls bounce out.
Your pocket should match your position and your hand. A shortstop wants a shallow, quick-closing pocket.
Start shaping the pocket by hand. Close the glove gently. Press your fist into the pocket. Do this slowly, working the leather. Don't force it.
Next, work the heel. The heel is the back of the glove, below the pocket. It's always stiff on new gloves. Press your thumb into the heel repeatedly.
Once the leather has softened a bit, use the mallet. This is where the Grade A Hickory Wood Mallet or Rawlings Glove Mallet makes a difference.
Tap the heel next. This area needs more work than the pocket. Keep tapping until it flexes easily when you bend it.
Work the webbing last. The webbing is the area between the thumb and fingers. It's stiff and needs to flex when you move your hand.
How to Break in a Baseball Glove Fast
Speed matters when you've got a game coming up. But fast doesn't mean reckless. You can accelerate the process without damaging the glove.
Using a mallet or pounding pad
A mallet is the fastest way to soften leather. The key is technique. Light, controlled taps work better than hard pounding. Hard pounding damages the fibers and can split the leather.
Hold the mallet loosely. Let the weight do the work. Tap the pocket 20 to 30 times per session. Tap the heel 30 to 40 times. Work the webbing 15 to 20 times. Rest between sessions. Your goal is to work the glove daily during the first two weeks.
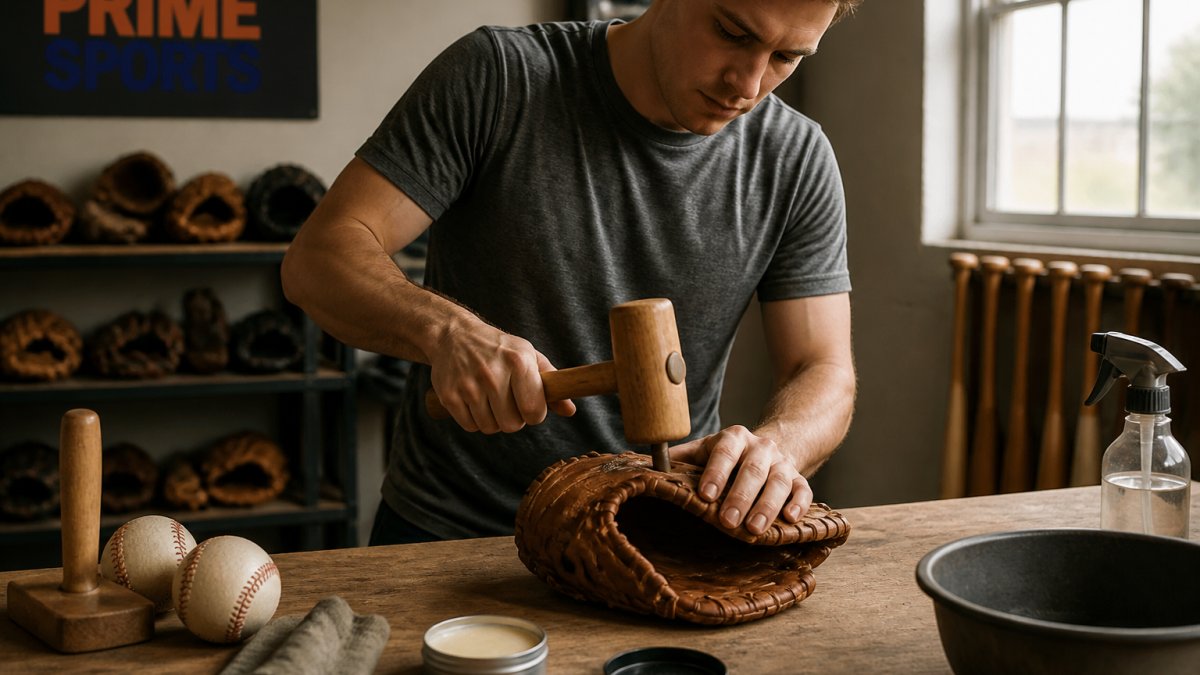
If you want maximum protection for the leather, the Grace Ball Glove Pounding Pad is designed for this. Its concave design spreads the force across a wider area. This prevents denting and keeps the leather's surface smooth. It's heavier than a mallet, which means you can work faster without hitting as hard.

Playing catch to loosen the leather
Playing catch is the most important part of the break-in process. It mimics game conditions. It shapes the pocket to your hand. It builds muscle memory.
Start with short distances. Twenty to thirty feet. Use a soft toss. The goal isn't to throw hard. It's to get the glove working.
Catch 20 to 30 balls per session. Do this three to four times per week during the first two weeks. Increase the distance and intensity in week three. By week four, you're playing normal catch at normal distances.
Playing catch does two things at once. It softens the leather through repeated impact. It also shapes the pocket to your hand and your throwing style. A pocket shaped to your hand performs better than a pocket shaped by a mallet alone.
Working the heel and stiff areas
The heel is the last part to soften. It's also the most important. A stiff heel limits your range of motion and causes hand fatigue.
Work the heel by hand first. Bend it back and forth. Press your thumb into it. Do this for five minutes per session.
Then use the mallet. Tap the heel 30 to 40 times per session. Focus on the area directly below the pocket. This is where most catches happen.
After mallet work, play catch. The impact of the ball hitting the heel accelerates the break-in process. Combine mallet work with playing catch, and you'll see results in one to two weeks instead of three to four.
What to Avoid When Breaking in Your Glove
Common mistakes can damage your glove permanently. Avoid these at all costs.
Never use heat. A microwave, oven, hair dryer, or direct sunlight will damage the leather. Heat dries out the fibers and makes them brittle.
Never soak the glove in water. Water causes uneven expansion and warping. It can damage the laces and the glove's structure.
Never use household products. Saddle soap, mink oil, or leather treatments designed for shoes or furniture aren't formulated for baseball gloves.
Never force the break-in process. Aggressive pounding or bending can split the leather or tear the webbing. Patience pays off.
Never neglect the laces. The laces hold the glove together. If they become too soft, the glove loses its structure.
| Common Mistake | What Happens | How to Prevent It |
|---|---|---|
| Using heat (microwave, oven, sun) | Leather cracks and becomes brittle | Let the glove dry naturally; use conditioner instead |
| Soaking in water | Leather warps and laces weaken | Wipe with a damp cloth only; air dry completely |
| Pounding too hard | Leather splits; webbing tears | Use light, controlled taps with a mallet |
| Using too much conditioner | Leather becomes oversaturated; attracts dirt | Apply thin coats; let dry between applications |
| Skipping the break-in process | Glove never softens; pocket doesn't form; hand fatigue | Dedicate 2-4 weeks to proper conditioning and playing catch |
Breaking in a new baseball glove takes dedication, but the payoff is worth it. A properly broken-in glove gives you confidence in the field. The pocket feels right.
The process doesn't require expensive equipment or complicated techniques. Conditioner, a mallet, and regular playing catch will get you there.
Frequently Asked Questions
How long does it actually take to break in a baseball glove?
Most gloves need 20-50 hours of active use to reach game-ready condition, depending on leather quality and construction. Youth gloves with softer leather may break in faster, while premium full-grain leather can take 50+ hours. Consistent use matters more than elapsed time; playing catch 3-4 times weekly will get you there faster than sporadic use. Position matters too: infielders typically need 30-40 hours because they handle more ground balls, while outfielders may need slightly less.
Should I use baseball glove oil and conditioner to speed up break-in?
Yes, but apply it sparingly. Glove conditioner softens leather and speeds break-in when used in small amounts. Products like Armie's Glovecon are designed to soften and condition without over-saturating the leather. Apply a light mist to the pocket and heel, then work it in by hand or with repeated catches. Too much conditioner can make the glove too soft and reduce ball retention. Start with a small amount and add more only if the leather remains stiff after several sessions.
What's the fastest way to break in a baseball glove?
Combine three methods: apply conditioner to soften the leather, use a mallet or pounding pad on the pocket 50-100 times per session, and play catch 3-4 times weekly. Focus on the heel and closing area, which stay stiffest longest. A quality mallet like the Grade A Hickory option or a pounding pad with concave design protects the leather while delivering the repetitive impact that softens it. Most players see significant results in 2-3 weeks with this approach.
Can I use heat, water, or household products to break in my glove faster?
No. Avoid heat, direct water soaking, and household oils or conditioners. These damage the leather's structure and can cause cracking, warping, and premature deterioration. Some players mistakenly use a microwave, oven, or wet towel method, these ruin gloves. Stick to purpose-made glove conditioner, a mallet, and playing catch. If your glove gets wet during play, dry it naturally at room temperature and condition it afterward. Heat and water shortcuts will cost you more in replacement gloves than proper break-in takes time.