

How to Prevent Jersey Print Cracking: 7 Essential Steps
Table of Contents
- What Causes Jersey Print Cracking and Peeling
- How to Wash a Sports Jersey Without Damaging the Print
- Can You Put a Jersey in the Dryer? Drying Best Practices
- How to Iron a Jersey With Lettering Safely
- How to Fix Cracked Jersey Numbers and Lettering
- Care Before the First Wash: Prevention Starts Early
- Storage and Long-Term Preservation for Team Uniforms
- Frequently Asked Questions
Last Updated: October 17, 2026
What Causes Jersey Print Cracking and Peeling
To prevent jersey print cracking, you need to understand one simple reason: the adhesive bond between the fabric and the printed design breaks down.
Heat-transfer prints and vinyl designs sit on top of the fabric using adhesive.
The main culprits are:
- High heat, Dryer heat and hot water accelerate adhesive breakdown
- Harsh detergents, Strong chemicals eat away at the adhesive layer
- Rough washing cycles, Agitation causes the print to rub against itself and the fabric
The difference between a jersey that lasts one season and one that lasts three comes down to how it's treated from day one, and most print damage is preventable.
How to Wash a Sports Jersey Without Damaging the Print
Washing is where most print damage happens, but "wash it inside out in cold water" is only the headline. The details below separate a jersey that survives three seasons from one that cracks by midseason.
Match the Wash Method to the Print Type
Not all jersey prints behave the same way in the wash, a one-size-fits-all routine can protect one finish and damage another.
- Heat-transfer vinyl and plastisol transfers: These sit on top of the fabric as a film held by adhesive. They are the most vulnerable to heat and agitation. Cold water, a gentle cycle, and inside-out washing are non-negotiable. Avoid any cycle that tumbles aggressively.
- Screen printing: Ink is pushed into the fabric mesh and cured, so it is more durable than a transfer but can still crack along thick ink deposits if the jersey is twisted or wrung. Wash inside out and skip the spin cycle's highest setting.
- Sublimation: Dye is bonded into polyester fibers rather than sitting on top, so it is the most wash-tolerant print type. The main risk is abrasion from zippers, velcro, or other garments, not water temperature. Still wash inside out to prevent pilling on the print face.
If you don't know your jersey's print type, check the interior care label or the manufacturer's product page. When in doubt, treat it like heat-transfer vinyl: cold, gentle, inside out.
Turn the Jersey Inside Out Before Washing
This is the single most important step. Turning the jersey inside out creates a barrier between the printed design and the agitation of the wash cycle, so lettering and numbers rub against the fabric instead of the drum. Do it before every wash, without exception.
Use Cold Water and a Gentle Cycle
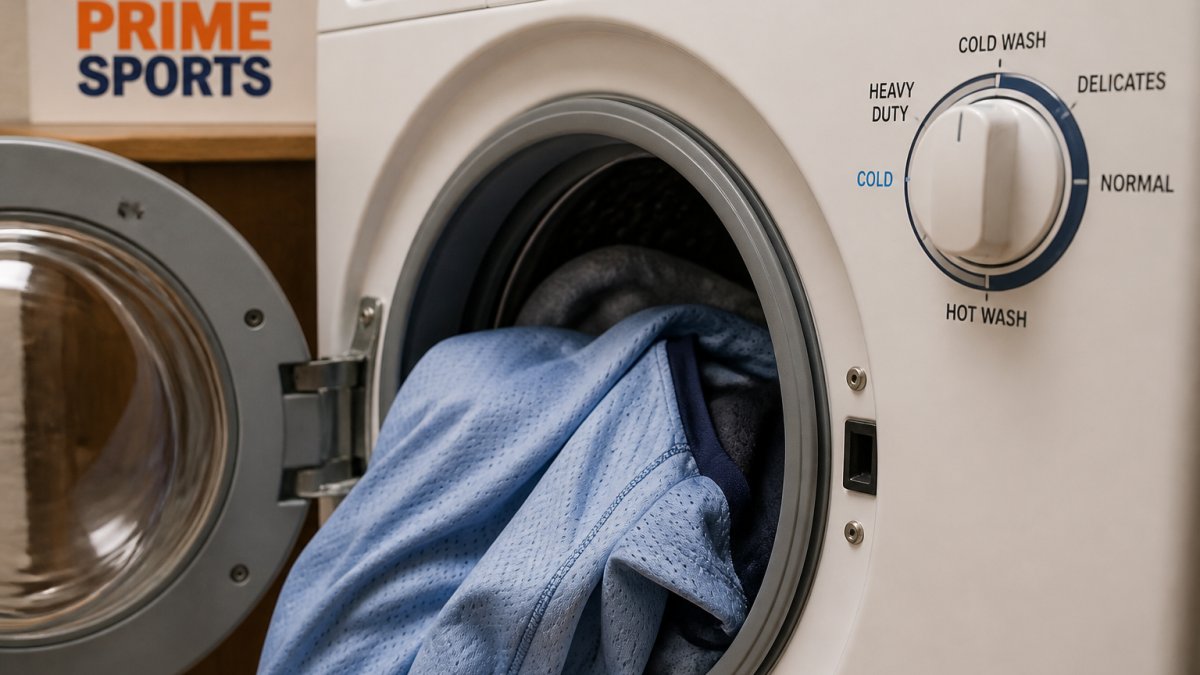
Hot water softens the adhesive that holds the print in place; cold water keeps it intact. Set your machine to cold water and the gentle or delicate cycle for less agitation and stress on print edges.
- Cold water: Protects adhesive and prevents color fading. Most machines define cold as 60-80°F; avoid any setting labeled warm or hot.
- Gentle cycle: Reduces friction and print stress. Look for a cycle labeled "delicate," "hand wash," or "gentle" rather than "normal" or "heavy duty."
- Low spin speed: Lowers centrifugal force on the printed areas. If your machine lets you set spin separately, choose the lowest option or no spin.
A regular cycle is not fine for athletic wear, the extra agitation shaves years off the jersey's lifespan.
Choose the Right Detergent
Harsh detergents contain enzymes and bleach that break down adhesive. Look for formulas labeled "gentle," "delicate," or "sport-specific," avoid bleach and heavy enzymes, and use a small amount, less detergent means less chemical stress on the print.
Skip the Wash When You Can
A jersey worn for a light practice doesn't always need a full machine wash. Spot-clean small marks with a damp cloth and mild soap, then air it out, every cycle is wear on the print.
Can You Put a Jersey in the Dryer? Drying Best Practices
The dryer is the enemy of printed jerseys. Heat damages the adhesive faster than anything else.
The safest option is air-drying: hang the jersey on a clothesline or lay it flat. If you must use a dryer, use the lowest heat setting and remove the jersey while still slightly damp.
Best drying methods:
- Air dry (best): Hang on a line or lay flat; takes 4-8 hours
- Low heat dryer (acceptable): Use lowest setting for 15-20 minutes only
- Avoid: High heat, medium heat, extended drying time
If the jersey is still damp after air-drying, finish it in the dryer on low heat for just 5-10 minutes to prevent mildew while minimizing heat exposure.
How to Iron a Jersey With Lettering Safely
Ironing a printed jersey requires care, direct heat on the print will damage it. If you must iron, place a clean cotton towel between the iron and the jersey, use low heat and no steam, and never iron directly over the printed design.
Ironing steps:
- Place a clean cotton towel over the printed area
- Set the iron to low heat (synthetic or delicate setting)
- Turn off steam completely
- Press gently for 5-10 seconds only
- Lift the iron and move to the next section
- Never hold the iron in one spot
Most jerseys don't need ironing if you hang them properly after air-drying.
Custom Tee Vision Jersey BST99 →
How to Fix Cracked Jersey Numbers and Lettering
Most guides jump straight to "iron it back on" or "glue it down," which can turn a small lift into a ruined jersey. Use the decision guide below to separate routine care from safe repair.
First, Decide Whether to Repair at All
Not every crack is worth fixing. Use these thresholds before you touch the print:
- Intact print with no lifting: Do not repair. Follow the washing and drying guidance above. Adding heat or adhesive to a healthy print only introduces risk.
- Small lifted edge (less than 1/4 inch) with the print still attached: A candidate for a careful heat reactivation or fabric adhesive repair.
- Cracked ink with no lifting (surface cracks in screen print or sublimation): Repair is cosmetic at best. Heat and adhesive will not restore cracked ink. Continue gentle care and accept the wear, or replace if appearance matters.
Safe Repair for Small Lifted Edges on Heat-Transfer Prints
If the print is a heat-transfer vinyl or plastisol transfer and the edge is lifting but the design is otherwise intact, heat reactivation is the least invasive option, a controlled, low-heat press works better than an iron because the pressure is even.
- Turn the jersey inside out so the print faces up through the fabric, or place the jersey print-side up on a firm, heat-safe surface.
- Cover the lifted area with a clean cotton cloth or a sheet of parchment paper.
- Set the iron to the synthetic or low setting, turn off steam completely, and press firmly for 10-15 seconds.
- Lift the iron and check whether the edge has bonded. Repeat once if needed, but do not hold the iron in one spot.
- Let the jersey cool completely before testing the edge with a gentle tug.
If the edge lifts again after cooling, stop. Repeated heat cycles degrade the adhesive and the surrounding print.
Fabric Adhesive for Edges That Will Not Reactivate
When heat alone doesn't hold the edge, a fabric-safe adhesive designed for heat-transfer prints is the next option. Follow the product instructions and test on a hidden area first.
- Clean the area with a soft cloth and let it dry completely.
- Apply a small amount of adhesive under the lifted edge with a toothpick or cotton swab.
- Press firmly for 30 seconds.
- Let it cure for the full time stated on the product, typically 24 hours, before washing.
- Wash the jersey inside out on a gentle cycle for the first wash after repair, and check the edge afterward.
When Not to Attempt a Repair
Skip the DIY repair and go to replacement or a professional in these cases:
- The print is sublimated. There is no adhesive layer to reactivate, and heat can distort the fabric.
- The damage covers more than a small edge, large lifts, missing numbers, or cracks across the center of a design.
- The jersey fabric is a heat-sensitive synthetic that shows shine or distortion at low iron temperatures. Test on an inside hem first.
- The jersey is under warranty. Contact the seller or manufacturer before modifying it; DIY repair can void coverage.
Prevention After Repair
A repaired jersey needs gentler care than a new one. Wash it inside out on the gentlest cycle, skip the dryer entirely, and store it flat or hanging rather than folded across the repaired area.
Care Before the First Wash: Prevention Starts Early
Most people don't think about jersey care until after the first wash, too late. Prevention starts the moment you get the jersey. Inspect the print for loose edges, thin spots, or weak adhesive. If you notice anything, contact the seller or manufacturer before washing; a defective print should be replaced under warranty, not repaired by you.
Store new jerseys in a cool, dry place, heat and humidity weaken adhesive before the jersey is even worn, and avoid plastic bags, which trap moisture.
Storage and Long-Term Preservation for Team Uniforms
How you store a jersey between seasons matters as much as how you wash it.
Store jerseys in a cool, dry place away from direct sunlight, UV light fades colors and weakens adhesive.
Storage checklist:
- Cool, dry location away from direct sunlight
- Fold along seams or hang on padded hangers
- Use acid-free tissue between folded jerseys
- Avoid plastic bags and damp areas
For team uniforms, proper storage extends the lifespan by years.
Jersey print cracking is frustrating, but you can prevent jersey print cracking almost entirely with proper care.
When you need custom team jerseys or replacement uniforms, Prime Sports makes the process straightforward.

Frequently Asked Questions
How do I wash a jersey without cracking the print?
Turn the jersey inside out, use cold water, and run a gentle or delicate cycle. Avoid hot water, which weakens adhesive bonds in heat-transfer prints and vinyl. Skip the dryer entirely, air dry flat or hang the jersey to prevent heat damage. Wash with mild detergent and avoid fabric softener, which can reduce adhesion. These steps protect printed designs, numbers, and lettering from peeling and cracking throughout the season.
Should I turn a jersey inside out before washing it?
Yes, always turn a jersey inside out before washing. This shields the printed design, numbers, and emblems from direct contact with the washing machine drum, reducing friction and abrasion. Inside-out washing significantly reduces the risk of peeling, cracking, and fading. It's one of the most effective prevention methods for protecting heat-transfer prints and vinyl lettering.
Can I put a printed jersey in the dryer?
No, avoid machine drying printed jerseys. Heat from the dryer accelerates adhesive breakdown and can cause vinyl, heat-transfer prints, and lettering to crack, peel, or curl at the edges. Air dry your jersey instead, lay it flat on a clean surface or hang it in a well-ventilated area away from direct sunlight. This preserves the print's integrity and extends the life of your uniform.
What should I do if my jersey numbers are already cracking?
For minor cracking, stop washing immediately and allow the jersey to air dry completely. Avoid further moisture exposure. For significant damage, repair options include regluing with fabric adhesive, though this requires careful application and may not match the original finish. Consider professional restoration or replacement if the damage is extensive. Prevention through proper care is far more effective than attempting repairs after damage occurs.